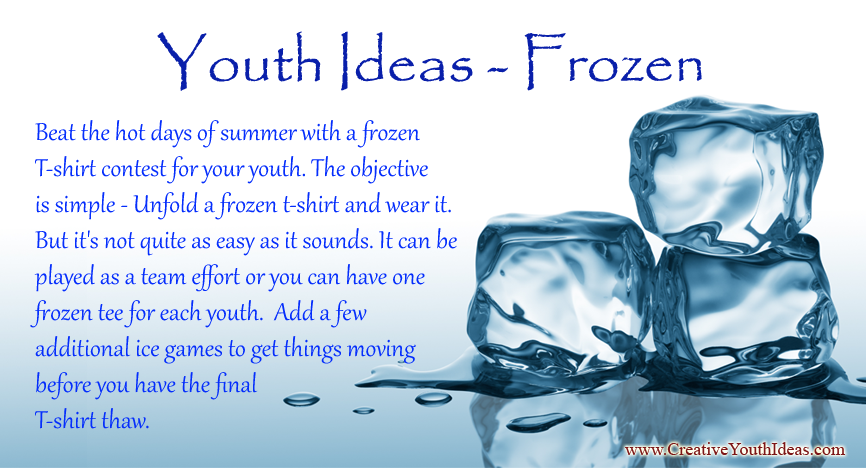
Beat the hot days of summer with a frozen T-shirt contest for your youth. The objective is simple – Unfold a frozen t-shirt and wear it. But it’s not quite as easy as it sounds. It can be played as a team effort or you can have one frozen tee for each youth. Add a few additional ice games to get things moving before you have the final T-shirt thaw.
PLEASE SHARE THIS IDEA ON FACEBOOK – CLICK HERE
Games Using Ice
- Back to Back Ice Relay – Split the youth into two teams. Freeze a water balloon for each team and just before the game starts, remove the balloon so you are left with a ball of ice. The first two people in line on each team have to put the ball of ice between both of their backs and walk to a designated finish line and then back to the team. If they drop it, they must go back to the beginning and start over again. First team to complete the relay wins.
- Build with Ice – Freeze and pop out a bunch of ice cubes. Use hot water to make clearer ice. Shake a little salt on the ice to act as glue as the salt melts the ice a little to help the cold cubes stick to one another. Construct creations by salting and adding cubes to create ice people, igloos, and other shapes.
- Cold Head – Place one ice cube on your head and the other on a competitors head. No hands allowed. First youth to drop the ice cube is eliminated. Continue until you have one champion. Variation – place the ice cube on the back of their necks.
- Ice Cube Melt – In this game, the objective is for the youth to fill a glass with water to the top using only the dropping water from melted ice. They may only use their hands to melt the ice. Only one ice cube can be melted at a time.
- Ice Cube Melt Relay – One Large ice cube per team (the ice cubes should be the same size). Divide the youth into two equal teams. Give each team an ice cube. The first player on each team holds and rubs the ice cube until their hands get too cold. Then they pass it to the next person on their team, and so on, until the ice cube is completely melted. The first team to completely melt their ice cube wins the game.
- Ice Cube Melting Race – Give each child an ice cube and see who can get it to melt the fastest in their hands. Working in pairs or teams is best, so when a child’s hands get too cold, they can pass the ice cube off to a teammate.
- Ice Cube Melting Race – Give each youth an ice cube and see who can get it to melt the fastest in their hands. Working in pairs or teams is best, so when someone’s hands get too cold, they can pass the ice cube off to a teammate.
- Ice Cube Transfers – Fill a bucket with water and lots of ice cubes. Teams try to remove ice cubes from the bucket using only their feet. Make it more challenging by putting on a blind fold.
- Ice Puzzles – Get some small lego sets with the instructions to create the object. Freeze all the pieces individually in ice cubes (It’s ok if longer pieces stick out of the ice cube). First team to thaw the pieces and follow the instruction to create the lego set wins.
- Marbles in Ice – Place a marble into each one of your ice cube trays’ sections. Fill with water as usual and freeze. Repeat this process until you have anywhere between 30 and 100 marbles. The more marbles you have, the longer the game will last and the more fun it will be. Give each youth an equal-sized cup and tell them that whomever fills their cup full of marbles first wins the game. Alternately, you can deem the youth with the highest number of marbles the winner. Then, let the youth decide how to melt the ice cubes and retrieve the frozen marble.
- Musical Ice Pass – This is a variation of musical chairs, with players passing an ice cube to music. When the music stops whoever is holding the ice cube is eliminated. Make it more fun by freezing a giant water balloon to replace the ice cubes. As a variation, give those eliminated a small ice cube. If any youth who was eliminated can use their hands to get the ice to melt before the game finishes they can join back into the game.
- Pick up ice cubes – Fill a paddling pool up with water and add ice cubes. Each person has to try and remove the ice cubes using their feet. Count out how many ice cubes each team/person is able to remove.
- Thaw it – Freeze a coin or any other small item in a block of ice. First team to unthaw the item without putting it in their mouth or hitting it with another object is the winner.
- Thread the Spoon – The day before the game, cut some yarn or string into long segments, allowing about 4 feet of yarn per team member. If in doubt, always make your yarn longer than necessary. Tie one end of one piece of yarn to the end of one spoon. Do this for each team. Put the spoons (with the yarn attached) in the FREEZER to freeze. For even more fun, run the string through one or more ice cube trays so that there are ice cubes froozen along the string as well. You may want to dip the spoons in water a few times to add a little ice build-up. When you’re ready to play, divide the youth into equal size teams. Hand the spoon to the first player and instruct them to put the spoon down their shirt, through pants legs (or skirts) and out by their feet. The fact that the spoons are cold will be apparent very quickly. The first person should also be instructed to hold the end of the yarn while the rest of the team repeats the threading process. NOTE: the spoon does not, and should not, go in undergarments; only inside of shirts, slacks, etc. The object of the game is to see which team can “thread the spoon” from the first person to the last. When done, the entire team will be stitched together!
Main Teaching Game – Frozen T-shirts
RESOURCES
- Gallon Freezer Bags
- You’ll need one t-shirt for each team or participant. Larger shirts are best and if possible you want them all to be the same size. Sometimes t-Shirts can be torn or stretched in the process.
- Water
- Freezer
PREPARATION
- Soak each t-shirt in about 2 cups of water then wring it out. If there is too much water it will take too long to thaw.
- Once the shirt has been wrung out, nicely fold each one into a square that will fit inside the freezer bag. Once you have folded it flat, press it down again to try to remove even more water.
- Seal each bag, and place each t-shirt in the freezer so that each lies flat.
- Let them freeze for a couple of days for best results.
- If you need to transport the shirts to another venue, place them in a cooler filled with ice so they stay frozen.
WHAT TO DO
- Tell the youth you are going to have a real icebreaker game.
- If you play by teams, don’t tell the youth what you are going to do and instead ask for a volunteer from each team. (You don’t want more than 4 or 5 on a team or it gets too crowded and some youth end up sitting on the sideline and watching.)
- Give each youth (or team) a frozen tee.
- The objective is to use whatever means possible to thaw the t-shirt enough so that it they can put it on. (They’ll sit on them like hatching an egg, throw them on the ground, rub them with hands, roll them, stick them on bare arms and legs to use their body heat to warm them up enough to unfold them and put them on.) They’ll be worn out trying to get them unfolded enough to wear.
- The first person to get the t-shirt on wins! Heads and arms must be completely in the t-shirt for normal wear to be declared the winner.
RULES OF THE GAME
- You might want to set some rules such as:
- You cannot place the t-shirt in water or any other liquids
- You cannot microwave it or use any appliance or machinery to heat it up.
- You cannot leave the game area
- You are not allowed to use any sharp object on the t-shirt
TAKE IT TO THE NEXT LEVEL
Like many things in life, this game takes a lot of effort. It’s the same with building relationships. If you want to have relationships that aren’t so cold and are more warm and friendly, it takes work. “Cold hearted” and “Hard – hearted” are terms we commonly use to describe how youth relate to others. We also often talk about the warmth of friendship.
- What happened during the game?
- What were the difficulties encountered?
- What made these tasks difficult?
- How difficult was it to melt the ice?
- What did you try that didn’t work so well?
- Did you get frustrated? Why or why not?
- What was the most effective strategy?
- What could you do differently to be more successful if you played again?
- Did you ever feel like giving up? What are some things that you have tried to do that ended up being so difficult that you gave up?
- What is something that was difficult but you kept at it until you got it done?
- What happened as a result?
- What lesson did you learn?
MAKE IT SPIRITUAL
- How is following God like playing this game?
- When we become Christians, are we able to put on holiness right away?
- Do you ever get frustrated thinking God isn’t working fast enough for you?
- How do you respond to God when He isn’t working fast enough?
- Have you ever gotten so frustrated with God, and impatient that you tried to rush things in your own way? What happened?
In the Bible, Cold and Hot are used to describe the relationship of a person with God. But God’s greatest criticism is not to a person is either hot or cold, but to someone that is lukewarm. In Revelation, God refers to the church of Laodicia in the same terms.
“I know your works; you are neither cold nor hot”. “Would that you were cold or hot! So, because you are lukewarm, neither cold nor hot, I will spew you out of my mouth” (Revelation 3:15-16).
MAKE IT PRACTICAL
Laodicia had no water supply of its own, so an aqueduct was built to bring water to the city from hot springs. By the time the water reached Laodicia is was neither therapeutically hot nor refreshingly cold. And because of it, one of the strongest words in Revelation is used, emesai, meaning to vomit.
- What actions of a Christian might be described as Hot? Cold? Lukewarm?
- How does a lukewarm Christian behave?
- Why is lukewarm worse than being either hot or cold?
- What is an area of your devotion to God that could be described as Lukewarm?
- If we are cold or lukewarm, how can we become “On Fire” in our devotion for God?
MAKE IT PERSONAL
- What can you do this week to become more fired up about your relationship with God?
- What can you do this week to share the warmth of Christ with someone?
SCRIPTURE
- Revelation 3:15-16 – “I know your works; you are neither cold nor hot”. “Would that you were cold or hot! So, because you are lukewarm, neither cold nor hot, I will spew you out of my mouth”
- 2 Peter 3:9 (NIV) – “The Lord is not slow in keeping his promise, as some understand slowness. Instead he is patient with you, not wanting anyone to perish, but everyone to come to repentance.”
PLEASE SHARE THIS IDEA ON FACEBOOK – CLICK HERE
 MORE IDEAS? See “Creative Object Lessons”
200 page e-book that explains everything you need to know when planning your very own object lessons. It contains 90 fully developed object lesson ideas and another 200 object lesson starter ideas based on Biblical idioms and Names / Descriptions of God.
![]()